
- Introduction
- How to Install and Configure
- Mailjet Contacts
- Mailjet Campaigns
- Mailjet Statistics
- Troubleshooting
- Conclusion
Introduction
The Mailjet Magento extension provides complete control of your Magento Email service using Mailjet. It not only replaces your default Magento transactional SMTP service, but is also a fullstack email marketing solution for your Magento website. The natively embedded plugin allows you to get the benefit of Mailjet’s leading email design, deliverability and tracking inside your Magento admin. This will help you optimize your outbound marketing and transactional email campaigns.
Mailjet has extensive reporting tools and advanced statistics available to help you monitor and optimize your emails.
How to Install and Configure
How to Install the Mailjet Extension
-
Click on the
mailjet-2.x.x.tgzfile name.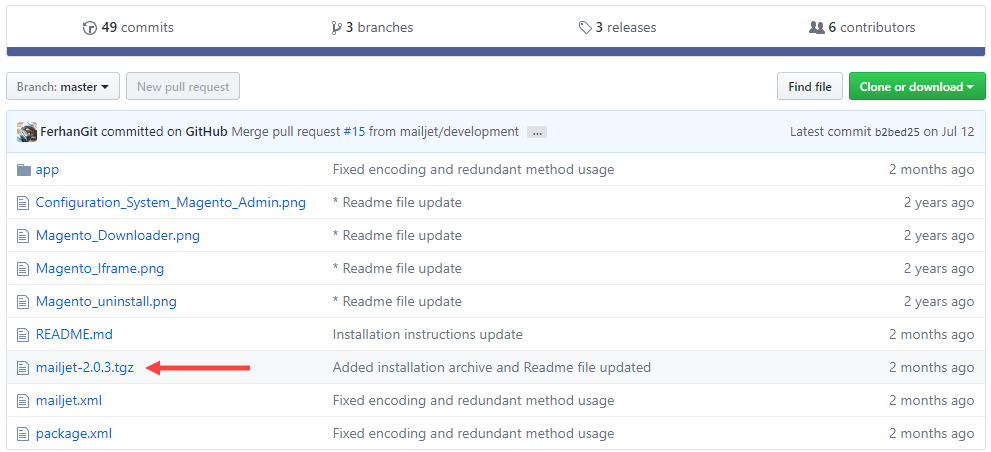
-
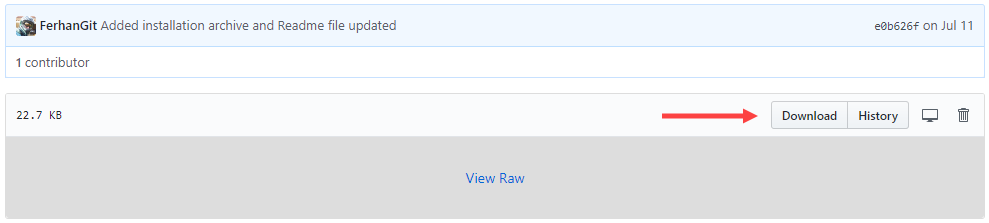
Use the ‘Download’ button to download the file.
-
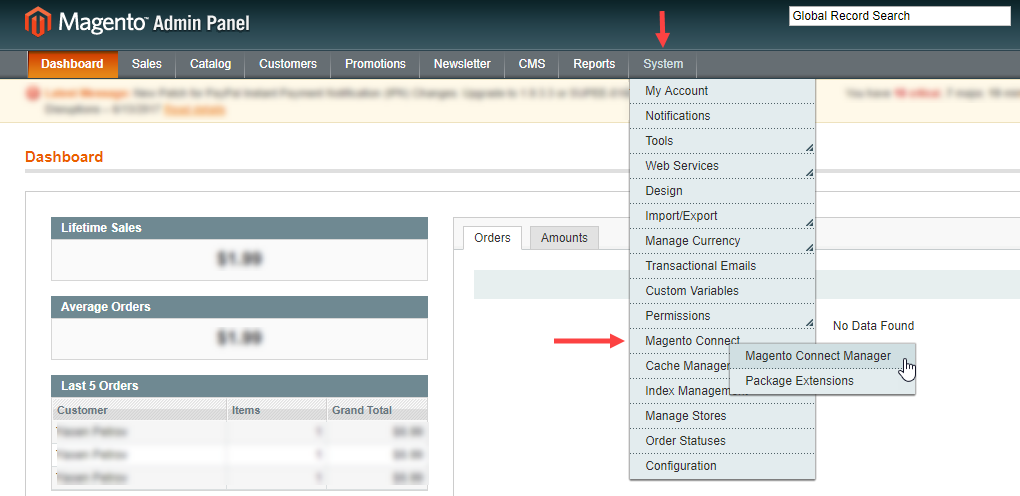
Log into your Magento Admin page and go to ‘System’ → ‘Magento Connect’ → ‘Magento Connect Manager’.
-
Under ‘Direct package file upload’ click on ‘Choose File’ and select the downloaded Mailjet extension file.

-
Click on the ‘Upload’ button to start the installation.

-
You will now see a console screen in the web page, which will show you the installation process. Once it is done, you can click on ‘Refresh’ to confirm that Mailjet has been added to your ‘Extising Extensions’.
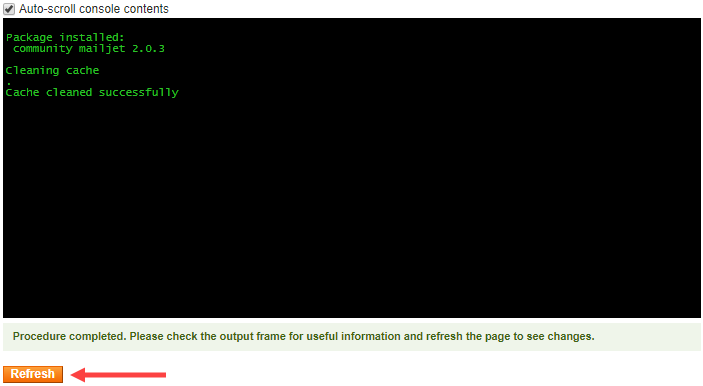

The Mailjet extension has now been successfully installed! You can go back to your Magento Admin page.
Mailjet Settings
-
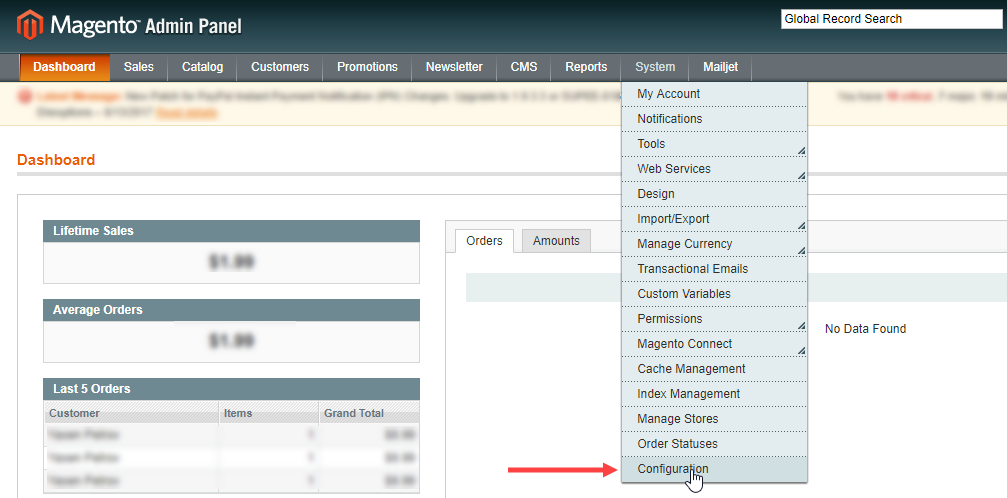
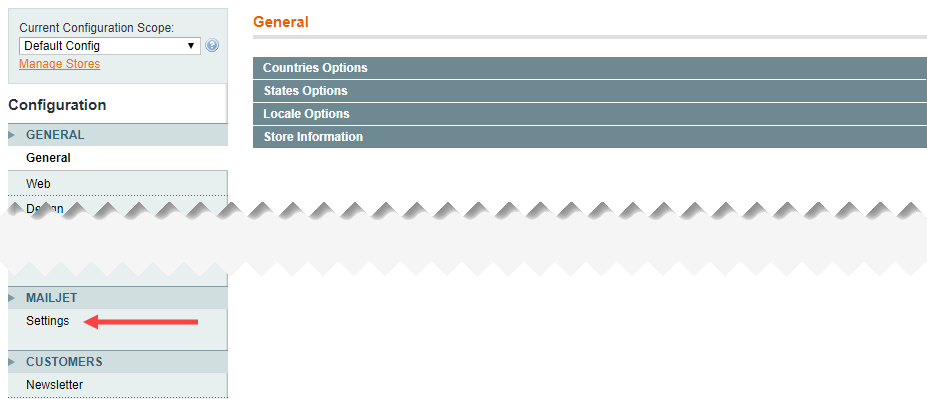
Now you need to configure your Mailjet account in Magento. In the Magento Admin, go to ‘System’ → ‘Configuration’.
-
In the left-side menu under ‘Mailjet’ click on ‘Settings’.
-
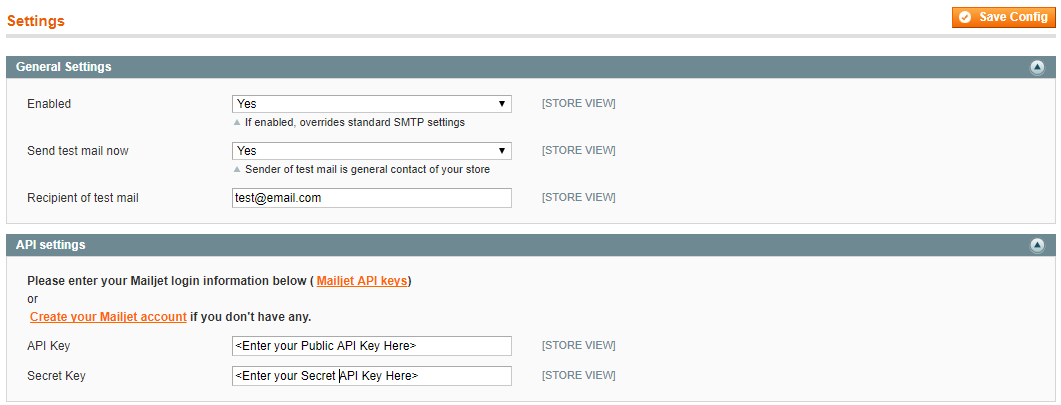
You will see the Mailjet extension configuration page. We will now describe the options available for you here.
-
Enabled - should be set to ‘Yes’. By enabling this checkbox, you are allowing Mailjet to send all of the emails emanating from your Magento environment (transactional emails and marketing campaigns). With Mailjet’s SMTP relay, you will have access to real-time statistics, triggered marketing events, order statuses, ROI on campaigns, optimized email deliverability and much more.
-
Send test mail now - you can use this option to test your Mailjet configuration. Simply select ‘Yes’, and once you save your new settings, an automatic email will be sent to the email address you have specified. The sender address for the test email will be the one you have selected for sending automatic emails from Magento - the “General Contact” email. For more information see the Store Email Addresses section of the guide.
-
Recipient of test mail - this is the email address where you will receive your test email.
-
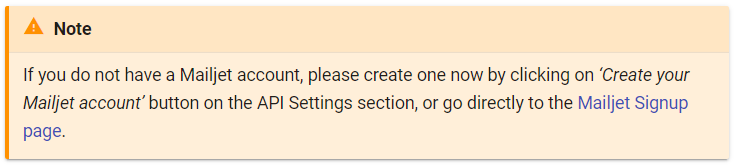
API Settings - You will need to enter your Mailjet API Key and Secret Key here to link your Mailjet account to Magento. You can find the API Key and Secret Key information in your Mailjet API Key Management page.
Once you have entered all the information you need, click on the ‘Save Config’ button to submit the changes. If you have opted to receive a test email, it will be sent as soon as you click on ‘Save Config’.

-
Configure Sender Address for Automatic Emails
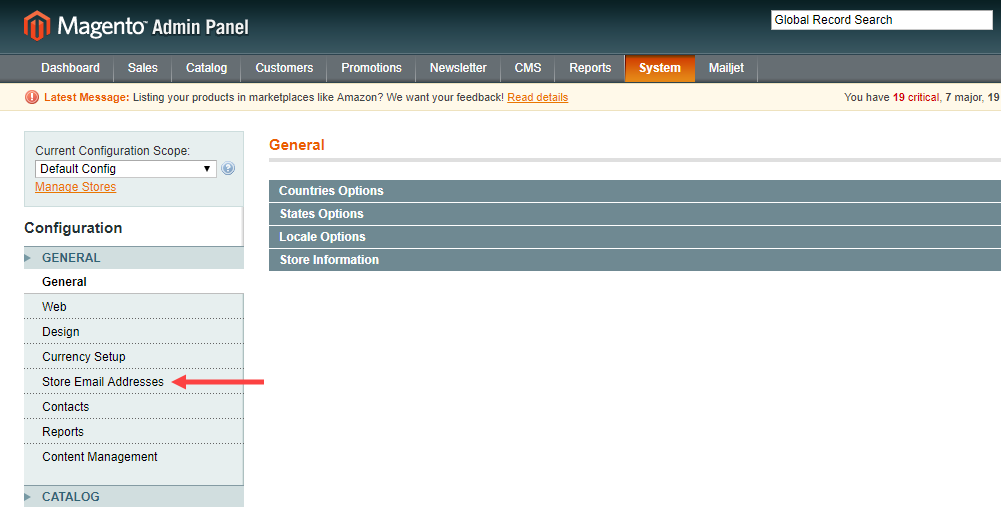
To select the Sender address for your automatic Magento emails, from the Configuration section go to ‘Store Email Addresses’.
You will see the different options for sender email addresses, where you can select the email and the Sender Name.
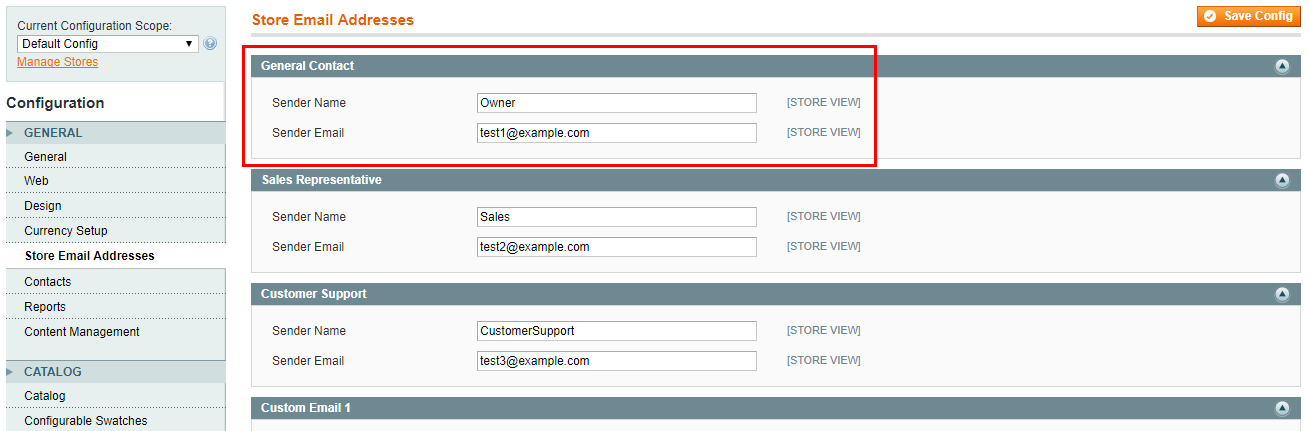
The ‘General Contact’ email will be the one used by Magento to send automatic emails. In order to successfully use it, you need to have the ‘General Contact’ email verified in Mailjet. To do that, please visit the Sender domains & addresses section of your Mailjet account.
Event Tracking
Event Callback (or Tracking) simply means whenever there is an event, an event is dispatched to the provided Endpoint URL, containing meaningful context about the event (like the recipient email, timestamp, etc). From here, the customer can script actions to be done following it.

In case you want to track certain events in Magento automatically, you can use the Endpoint URL displayed at the top of the Mailjet ‘Settings’ section.
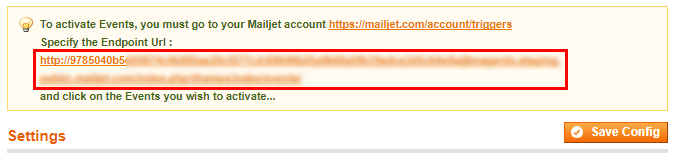
To track the events you want you need to first copy the displayed link, then go to the ‘Event Tracking’ section of your Mailjet account.
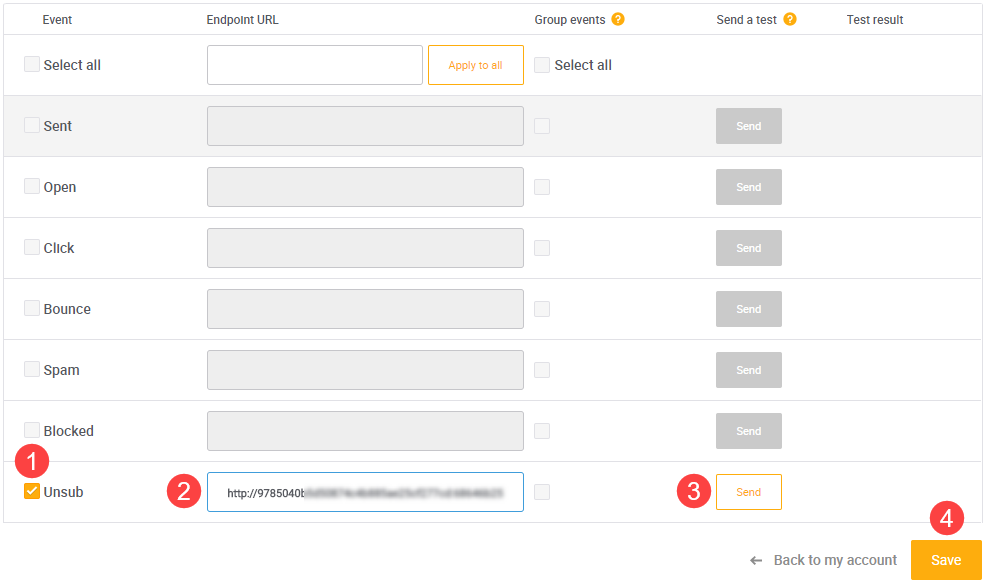
Let’s look at the ‘Unsub’ event. In this case, when a recipient unsubscribes from your newsletter (the event), that information is pushed to Magento and that recipient’s profile is automatically updated (the action). The steps you need to follow are:
- Tick the checkbox next to the ‘Unsub’ event.
- Paste the URL you copied earlier in the ‘Endpoint URL’ box.
- Click on ‘Send’ to test the URL. If the test is successful, you will see a ‘OK, Code 200’ response.
- Click on ‘Save’ to submit the changes.
Congratulations - you have successfully configured your Mailjet Extension!
Note
Once your configuration is saved, your Mailjet account will be linked to Magento. Your Magento customer contacts will be automatically transferred to a new Mailjet Contact List, along with the contact properties configured there.
Mailjet Contacts
How to Manage Your Magento Contacts
When you configure Magento to send emails through Mailjet, all of your contacts will automatically be transferred to a Mailjet contact list called ‘1_magento_customers_master_list’. The list will be continuously updated when new contacts are added in Magento.
You are also able to configure Mailjet to automatically update your contact list whenever a Magento contact unsubscribes from your mailing lists. To do that, please check our section on Event Tracking.
How to Manage Your Mailjet Contact Lists
To send out your marketing campaigns with Mailjet, you need to use contact lists that contain the contact details of all the subscribers you want to reach. You can use these contact details to further connect with your customers with email personalization, tailoring each email sent within a campaign to make your users feel unique and important.

Here you will see a list of all the contact lists you currently have on your Mailjet account. If any contacts were automatically migrated, you will also see a newly created contact list. If you have no contact lists, the area will be empty.
In this section you will be able to create, edit, duplicate, archive and delete your contact lists. You can also create new contact properties, or add emails to your Campaign Exclusion List.
For detailed information please visit our dedicated guide on Managing your contact lists.
Contact Properties
To store details about your subscribers (name, age, city, …) in your Mailjet contact list, you need to define/create the different contact properties you wish to associate with your Mailjet contacts. Once defined, you can then import your contact list details and map them to the relevant contact properties on the Mailjet side.
The inclusion of additional details regarding your subscribers will help you with personalizing emails in Mailjet, or with segmentation of the contact list for marketing campaigns, for example.
For more information on how to manage the properties, please visit the Contact Properties section of our guide on Managing Contact Lists.
Mailjet Campaigns
From within the Magento admin, you can design beautiful marketing newsletters using Mailjet’s drag-and-drop HTML email builder, or pick from a gallery of templates. With one easy click, you can also turn your newsletter design into a template for future use. In addition, you have the option to import already created templates by pasting the HTML code in our HTML editor.
To access the Mailjet Campaigns section, in the Magento admin go to ‘Mailjet’ → ‘Campaigns’.
For detailed information on how to create and send your campaigns, please visit our dedicated guide.
Mailjet Statistics
To view the powerful real-time analytics of your campaigns and emails, click on the ‘Stats’ link in Magento.

Select the desired time range for the stats page.

By clicking on ‘Show me the reports’ you will be able to see information on each of the recipients of the campaign:


In addition to the Email List view (default), you can view the Open Analytics and the Click Analytics in a list view or via a map view.

By default, all emails statuses are displayed. You can filter the results to display only one email status via the ‘Status’ drop down menu.

To export the email lists section to a text file, click on the ‘Download all as CSV’ button.

To update a contact list based on the results, click on ‘Export to a list’. For example, if you wish to remove all the ‘bounced’ email addresses from a particular contact list, filter the results to show only ‘Bounce’, click on ‘Export to a list’ and follow the instructions.
Troubleshooting
The Magento ‘Contact Us’ page allows you to contact the Magento Customer Support for answers to questions about extension functionalities and common issues.
Of course, feel free to contact our Customer Support team, in case you come across any technical difficulties with the Mailjet product - our team of specialists will be more than happy to assist you! Please visit the Mailjet ‘Contact Us‘ page for more information.
Conclusion
We hope you find this guide helpful. Let us know what you think of the Magento integration process, or especially what functionality we should introduce next by emailing plugins@mailjet.com.
Happy Mailjetting,
Mailjet Integrations Team